
Are you familiar with heat press machines and how easily they customize apparel? Heat presses are becoming increasingly popular among those wanting to create t-shirts, hats, sweatshirts, etc. You can have beautifully detailed garments with your design or logo in simple steps. This post will teach you how to use a heat press machine to create a custom look quickly. This beginner's guide to using a heat press will teach you the basics.
What is a Heat Press?
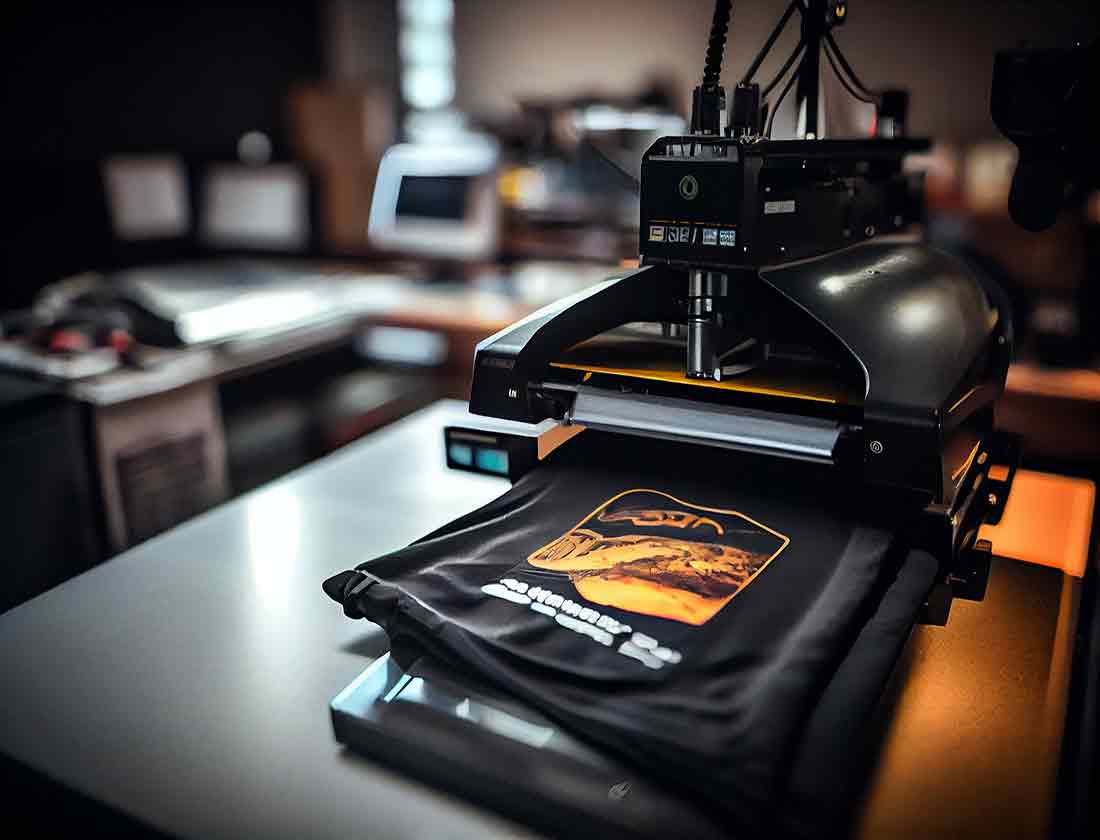
Heat Press Machines are versatile, powerful machines that utilize a combination of heat and pressure to transfer digital images and designs onto various substrates. They are essential tools in the printing and garment industries, used to create customized designs across a range of textiles and rigid substrates without compromising the integrity of the material.
Heat Press Machines have three main components: a heating element, a heat platen, and pressure settings. These components work together to transfer designs onto substrates for heat transfer projects. The heating element generates heat to transfer the design, and the heat platen regulates and distributes the heat evenly across the substrate. The pressure settings apply pressure, allowing the heat and design to imprint onto the substrate.
Heat Press Machines are available in various sizes and styles, with multiple features to suit your requirements. Some models are for commercial use, with large platen sizes and adjustable pressure settings for high-volume jobs. Other heatpress models are for small businesses or homes, with smaller platen sizes and user-friendly features.
There are different types of Heat Press Machines, with some designed to handle more delicate fabrics, such as those used in sports uniforms. Other machines work with more rigid substrates, such as ceramic tiles or coffee mugs, making them ideal for creating custom promotional items.
Heat Press Machines have become a vital tool in the printing and garment industries. They offer outstanding versatility and flexibility, enabling businesses of all sizes to produce custom product designs. As technology advances, newer, more innovative Heat Press Machines will likely continue to emerge, further expanding their capabilities.
How Does Heat Presses Work?
Heat press machines transfer designs, images, and patterns onto various substrates, such as fabrics, ceramics, and metals. They work by applying heat and pressure to a transfer paper or vinyl, which transfers the design onto the substrate.
The workings of heat press machines involve several parts and functions. Firstly, the heating element is responsible for heating the platen or the machine's upper part. The heating element can be a coil or a heating pad controlled by a thermostat that maintains a desired temperature range.
The pressure mechanism applies to the transfer paper, vinyl, or other medium. It can be a hydraulic pump, an air compressor, or a manual lever.
Thirdly, there is the timer function, which controls the duration of the transfer process. The timer function can be mechanical or digital, allowing the operator to set the time required to transfer the design onto the substrate.
Heat press machines heat the platen, apply pressure on the transfer medium, and transfer the design onto the substrate. The type of heat press machine used depends on the size, thickness, and quantity. You must have the correct printer accessories for quality results.
Step-By-Step Instructions to Use a Heat Press Machine:
Select Your Materials:
For a successful heat transfer, choosing suitable materials is essential. You will need a heat press machine, transfer paper, and the fabric you want to print on. Mastering even heat distribution is key to avoiding cold spots and achieving professional-quality results. Before you begin, ensure your heat transfer vinyl is cut correctly and weeded to match your design. The fabric selection depends on your preference; cotton, polyester, or a blend is best for heat press printing. Clothes made of cotton are excellent for printing images and logos, while polyester is best suited for designs that require more vibrant and intense colors. When selecting the transfer paper, choose quality paper compatible with your printer. Set the correct temperature and pressure on your heat press machine based on the type of transfer paper and material you're working with. Different printers require specific types of transfer paper, so check the manufacturer's instructions before purchasing. Generally, there are two types of transfer paper: light and dark. Light transfer paper suits light-colored fabrics, while dark transfer paper suits dark-colored or colored fabrics. Finally, double-check the transfer paper compatibility with your printer and the material you plan to use.
Having the correct materials is critical to obtaining professional results when using a heat press machine. Use high-quality transfer paper to ensure vibrant, long-lasting prints. Vinyl heat transfer papers should not be confused with sublimation transfer paper used for sublimation printing. Getting quality supplies is the foundation for success in heat transfer printing. Choosing the materials best suited to your specific needs will ensure you create a personalized product that will last a long time.
Choose a Design:
With numerous designs available, selecting the right design for your project can be challenging, but making a good impression is essential. If you're working on a professional project, logos or product images typically work well, while personal items such as t-shirts, personalized sayings, and catchy phrases can be significant.
You can use pre-made designs or create your artwork on graphic design software. You can also use clip art to create something unique and more personalized for your project. After choosing a perfect design, save it on your computer and open the image in your transfer paper software. Select the size and orientation, and prepare it for printing.
When selecting a design, you must consider your target audience, the purpose for which you're doing the project, and the colors you want to use. Aim for a visually appealing design that is easy to see to make your design stand out.
The design you select can significantly impact the success of your project. Choose a design that will make the best impression and represent your message, whether a logo or a funny catchphrase. Take your time while choosing or creating a design to avoid waste or even having to do the project again.
Print Your Chosen Design on the Transfer Paper
Once you have chosen the design to transfer onto your desired fabric, it is time to print it on heat transfer paper. Ensure your design is suitable for heat transfer printing and that you have the right printer. Using the correct printer and heat-resistant tape ensures you print your design correctly.
Mirror your design before printing on the transfer paper. Your design will flip once you transfer it onto the fabric, so mirror the image before printing to ensure it appears correctly on the material. Place the heat transfer vinyl on the fabric with the shiny side facing up and the adhesive side down.
When you have loaded the transfer paper into your printer, print the design onto the paper as you would with any other paper, following the manufacturer's instructions. Ensure the ink is dry before setting up the heat press to transfer your chosen design.
Set Up the Heat Press
Once you have printed your design onto the transfer paper, it's time to focus on your heat press settings. First, plug in and switch on your machine correctly. Once you turn on the machine, set the correct temperature and timing settings according to the instructions provided by the machine's manufacturer.
Ensure that the plates and the entire machine are clean before use to prevent damage or the transfer of unwanted particles to your fabric. Set your press machine to the recommended temperature and pressure based on the type of heat transfer vinyl you use. Place a clean cloth on the bottom plate to ensure the hot metal plate does not damage your fabric.
Let your fabric cool entirely before positioning it between the plates in preparation for pressing, avoiding any risk of injury to the user.
Position the Fabric Between the Top and Bottom Plates
Once you have set up your heat press and selected your materials, it is time to begin printing. The first step is to position the fabric you want to print on between the top and bottom plates of the heat press.
Ensuring you correctly position and spread the fabric evenly on the press is essential. That's why we have created this easy guide for you. You can do this by following these simple steps:
- Lay the fabric flat on the heat press's bottom plate, smoothing out any wrinkles or creases.
- Ensure the fabric is positioned centrally on the plate so your design prints accurately.
- If you are printing on multiple layers of material or a garment with a seam or collar, take extra care when positioning the fabric.
- Once you correctly position the fabric, you can proceed to the next step: placing your design on the cloth.
For consistent results, always ensure even heat distribution across your design when using a heat press machine. Be cautious of the type of heat transfer paper or fabric. The heat transfer vinyl process requires attention, and you should perform it with all the safety measures in place.
Place Your Design on the Cloth
Now that the fabric is on the heat press, you can put your design on it. Before doing this, double-check that you correctly printed your design on the transfer paper.
To place your design on the cloth, follow these easy steps:
- Carefully peel the heat transfer paper from the backing paper, ensuring the design remains on the paper.
- Position the transfer paper on the fabric with the design facing downwards. Ensure that the design aligns correctly with the fabric underneath.
- Place a sheet of Teflon paper over the transfer paper and fabric. The Teflon paper will protect the design and your heat press plates from any excess ink or residue.
- Secure the Teflon paper and fabric in place on the heat press by locking down the top plate.
- Heat-resistant tape is essential for holding steady heat transfer vinyl or sublimation paper on your garment. When aligning your design on fabric, apply heat-resistant tape to ensure perfect placement throughout the press cycle.
- Set the heat and time settings on the heat press according to the instructions on your heat transfer paper; whether you need a medium pressure setting or high, adjust with the pressure knob.
- Once the press has finished printing, release the locks and carefully lift the top plate to remove the fabric.
- Allow the fabric to cool completely.
Peel the Transfer Paper
Peeling the heat transfer paper indicates the end of the heat press process. After you press the transfer paper onto the fabric with heat, the next step is to remove it. This step is critical for ensuring the design has transferred successfully and permanently onto the fabric.
To begin, let the fabric cool down for a few seconds before attempting to peel off the transfer paper. Hot transfer paper can cause burns to the skin, so be careful when handling it. Wear heat-resistant gloves and use both hands to grab the edge of the inkjet transfer paper and pull it back slowly. If you notice that the design has not transferred fully, stop peeling the paper and place it back on the fabric before applying heat and pressure again to ensure the design transfers successfully onto the fabric. When removing the transfer paper, it is essential to pay attention to the type of fabric used.
Peeling the transfer paper is crucial in the heat press process. Handling the heat transfer paper carefully and ensuring it successfully transfers onto the fabric is essential. After pressing, peel the backing sheet while the heat transfer vinyl is still warm. Always use heat-resistant tape instead of regular adhesives, as it can withstand the high temperatures of a heat press machine without leaving residue. By following these instructions, you can be sure that your final product looks professional and aesthetically pleasing.
How to Use a Heat Press Machine for T-Shirts
Here's a breakdown of the steps involved in using a heat press machine to personalize your next t-shirt:
- Prepare your design and t-shirt: Choose your desired design, whether a pre-made iron-on transfer, vinyl cutouts, or sublimation prints. Ensure your t-shirt is clean, dry, and wrinkle-free for optimal results.
- Preheat your press: Locate the temperature settings on your heat press and consult the instructions for your specific transfer type.
- Position your design: Place your t-shirt on the heat press platen and carefully position it exactly where you want it to appear. Before pressing, use heat-resistant tape to secure your design and prevent shifting during the transfer. Use heat-resistant Teflon sheets on top of your design to avoid scorching.
Once the press reaches the desired temperature, apply firm pressure by lowering the handle and closing the press for the recommended time (refer to your transfer instructions). Once the pressing time is complete, carefully lift the handle and allow the design to cool completely before peeling away the heat transfer paper (if applicable).
Follow the care instructions for your specific transfer type to ensure long-lasting results.
Conclusion
Heat-pressing machines or presses conveniently customize fabrics and apparel with exciting and eye-catching designs. These step-by-step instructions make setting up your machine and experimenting relatively easy. But keep in mind that it is vital to research all the safety features associated with heat pressing and, most importantly, use the protection that your machine offers you. Following these tips, you can create stunning designs on a t-shirt or other fabric with your heat press machine in no time!
At Allprintheads, we have an extensive range of Heat Presses and specialty papers like sublimation transfer paper to help you create various Sublimation and DTF applications for your promotional products and garments. To get in touch with us, please email us at sales@allprintheads.com or call us at 800.616.0584. We are always delighted to assist you!

2 commenti
JAIME GHISAYS
Certainly, Mr. James. What are you looking for? Please feel free to email me at sales@allprintheads.com with any questions or specific needs, so we can assist you effectively. Thank you for engaging with our blog.
Olayiwola James
You have a wonderful presentation or write up.
Pls do me a favour by sending vedio of beginner T shirt printing at home.
Secondly how can get the machine purchased.
Thanks
Tel. +234 8079463817