
Heat transfer paper is a fantastic tool for customizing fabrics with your unique designs. Whether a hobbyist or a professional, understanding how to use heat transfer paper can open creative possibilities. This guide will walk you through the process, ensuring you consistently achieve professional-looking results.
What is Heat Transfer Paper?
Heat transfer paper is specially coated to move printed images onto fabric using heat and pressure. The heat transfer process ensures the design bonds firmly to the fabric, creating a durable and vibrant print. It also performs well on polyester-blend fabrics, which are ideal for athletic and mixed-material garments.
There are two main types of heat transfer paper: inkjet and laser. Inkjet transfer paper is designed for inkjet printers, while laser transfer paper is compatible with laser printers. Choosing the right paper type for your printer is crucial for achieving the best results.
When selecting heat transfer paper, brands like Neenah and Forever are popular due to their high quality and reliability. Available at any reputable online printer store, these brands offer excellent transfer quality and durability.
Understanding heat transfer paper and its functions will help you choose the right products and techniques for your projects. Whether customizing t-shirts, tote bags, or other fabric items, mastering heat transfer paper can enhance your creativity and the quality of your finished products.
How Does Heat Transfer Paper Work?
To get the best results on different materials, it’s essential to understand how heat transfer paper works in real-world printing applications. Heat transfer paper uses heat and pressure to transfer a printed design from the paper to a fabric surface. Here’s a breakdown of the process:
- Printing: First, print your design onto heat transfer paper with an inkjet or laser printer. Ensure you mirror your design before printing, as the transfer process will reverse the image.
- Heat and Pressure: Place the design, printed side down, on the fabric. You apply heat and pressure to the paper using a heat press machine, such as an Insta Heat Press. Heat activates the adhesive on the transfer paper, causing it to bond to the fabric fibers. This heat transfer technique is essential for achieving a lasting, vivid design on your fabric.
- Transfer: As the heat and pressure are applied, the design transfers from the paper to the fabric. The duration and temperature settings vary depending on the type of heat transfer paper and fabric used. Brands like Neenah heat transfer paper provide specific instructions to achieve optimal results.
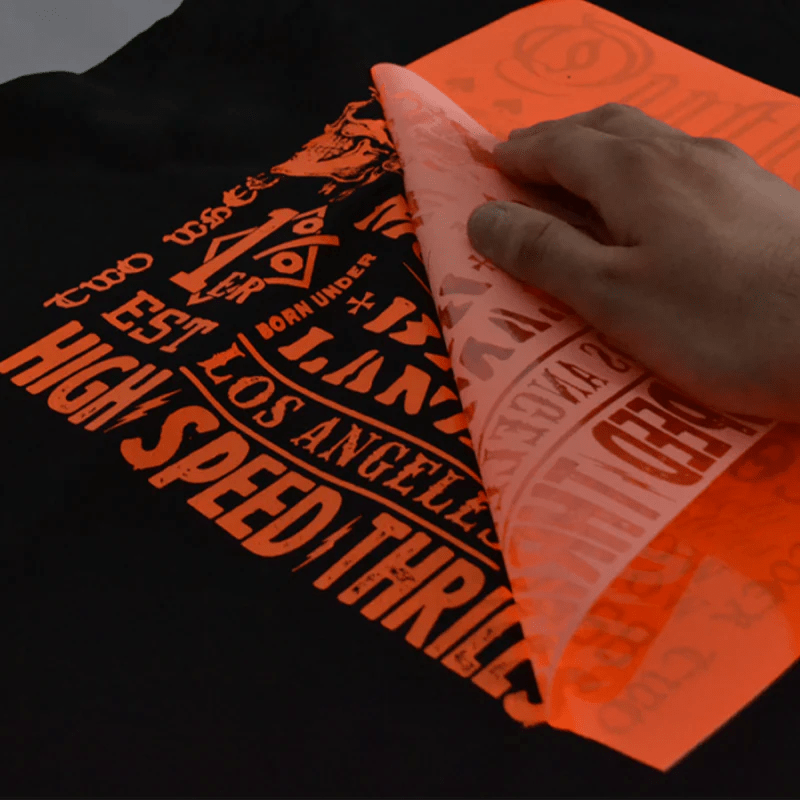
- Peeling: After transferring the photo onto the textile, peel off the backing paper, leaving the design adhered to the fabric. To ensure a clean and complete transfer, follow the manufacturer’s guidelines for cooling and peeling.
Understanding how heat transfer papers work lets you make informed decisions about your equipment and materials. When comparing heat transfer vs. sublimation, heat transfer paper is often more accessible to beginners and offers a straightforward way to create custom designs. Knowing how to use sublimation transfer paper can also expand your creative options, but inkjet transfer paper is a fantastic choice for simplicity and versatility.
Mastering these techniques can produce high-quality custom items with professional finishes. Whether working on personal projects or commercial orders, using the right tools and following proper procedures will ensure your designs come out perfectly every time.
Step-by-Step Guide on How to Use Heat Transfer Paper
Using heat transfer paper to customize fabrics is straightforward and can yield professional results. Follow these detailed steps to ensure your designs transfer onto the sheets perfectly every time.
Set Up Your Heat Press Settings
Mastering the heat transfer settings on your press machine can significantly improve the quality of your final product. A well-maintained heat press machine ensures even pressure across the design. Start by turning on your heat press and adjusting the settings according to the heat transfer paper specifications. For instance, using Neenah heat transfer paper, refer to the manufacturer’s guidelines for optimal temperature, pressure, and time settings.
Typically, you should set the temperature between 350°F and 375°F, use medium to high pressure, and press for about 15 to 30 seconds. These settings can vary depending on the fabric type and the specific transfer paper, so always double-check the instructions. Proper setup ensures the even distribution of heat and pressure, allowing the transfer to adhere correctly to the fabric.
Using a high-quality heat press can significantly affect the sharpness and durability of your transferred design. Constantly adjust your heat press settings based on your fabric and paper to avoid under- or over-pressing the design. If you’re new to using a heat press, consider watching tutorials or reading additional resources on how to use a heat press machine.
Choose the Right Paper
Choosing the correct light heat transfer paper is vital for achieving the best results. The type of paper you select depends on the printer you use and the fabric you’re transferring onto. There are two main types of heat transfer paper: inkjet printers and laser printers. Laser printers require specific transfer paper to withstand the higher temperatures during printing.
Inkjet printers offer great flexibility for hobbyists creating detailed and colorful designs. High-quality inkjet transfer paper helps achieve crisp lines and vibrant colors on various fabric types. For inkjet printers, Neenah and Forever heat transfer paper are excellent choices. These brands offer high-quality paper that ensures vibrant colors and durable transfers. If you’re using a laser printer, select paper specifically designed for laser printing to avoid smudging and poor adhesion.
When browsing an online printer store, look for papers compatible with your printer and suitable for the fabric you plan to use. Consider the fabric's color; some papers are ideal for light-colored fabrics, while others perform better on dark materials. Choosing the right paper ensures that your designs are sharp, vibrant, and long-lasting.
Prepare Your Transfer
Preparing your transfer is a critical step in the process. Start by designing your image or graphic using the design software of your choice. Make sure to mirror the image before printing, as the transfer process will reverse it. This step is crucial for text and directional graphics.
Print your design onto the dark heat transfer paper, for example, using your inkjet or laser printer. For best results, use the highest-quality print settings. Ensure the paper is loaded correctly into the laser printer to avoid any alignment issues.
Once printed, trim the excess paper around the design to reduce the risk of unwanted transfer marks. This preparation step helps achieve a clean, professional look. By carefully preparing your transfer, you help ensure a smooth application process.
Put Your Design on Paper
With your design printed and trimmed, it’s time to place it on the fabric. Position your design face down on the fabric where you want the image to appear. Ensure that the design is centered and aligned correctly. You can use a ruler or a grid mat to help with precise placement.
Securing the design with heat-resistant tape can prevent it from shifting during pressing. This step is beneficial for larger designs or multiple pieces. Securing the design ensures the transfer remains in the desired position, resulting in a flawless finish.
Taking the time to accurately position your design on the fabric helps achieve a professional and polished look. Proper alignment and secure attachment of the design are critical to successful heat transfer.
Get Your Fabric Ready
Preparing your fabric is essential for a smooth transfer. Begin by pre-washing the fabric to remove any dirt or oils that could interfere with the transfer process. After washing, dry the fabric thoroughly to ensure it is entirely moisture-free.
Iron the fabric to remove any wrinkles and create a flat surface for the transfer. A smooth, wrinkle-free surface ensures the transfer paper adheres evenly, producing a clean, professional finish.
Position the fabric on the heat press machine, ensuring it is flat and fold-free. You can also place a layer of parchment paper over the design to protect the fabric and the transfer during pressing. If you’re working with delicate or heat-sensitive fabrics, consider using a pressing cloth or parchment paper to protect the material during the transfer process.
Proper preparation of the fabric sets the foundation for a successful transfer. Ensuring the fabric is clean, dry, and smooth helps achieve the best possible results.
Close the Heat Press to Apply
With your design and fabric prepared, it’s time to apply the heat press. Close the heat press machine and use the preset temperature and pressure settings. Ensure the press closes evenly to distribute heat and pressure uniformly across the design.
Refer to the manufacturer’s instructions to determine whether to use a warm or cold peel method. Typically, this ranges from 15 to 30 seconds, depending on the type of light fabric transfer paper and the material. Applying the proper heat and pressure is crucial for a successful transfer.
Once the pressing time is complete, carefully open the heat press and remove the fabric. Allow the fabric to cool slightly before moving on to the next step. Proper application of heat and pressure ensures the design adheres firmly to the fabric, resulting in a durable, vibrant transfer.
Peel the Transfer Paper
Properly peeling the transfer paper is crucial for a clean, successful transfer. Depending on the heat transfer paper, you may need to peel it while it's warm or wait until it cools. Refer to the manufacturer’s instructions for the best results.
To ensure the design remains intact, be cautious not to tear the backing paper during removal. Use a slow, steady motion to avoid lifting the design off the fabric. If the design doesn't stick, press it again with the heat press for a few seconds.
Peeling the transfer paper ensures the entire design transfers cleanly and evenly onto the fabric. This step is essential for achieving a professional-looking finish.
Caring for Your Finished Product
Proper care ensures longevity once you have successfully transferred your design. Allow the transfer to cool completely before handling or washing the fabric, as this helps the design set firmly into the material.
When washing, turn the garment inside out to protect the design. Use a gentle cycle with cold water and mild detergent. Avoid using bleach or fabric softeners, as these can damage the transfer. Fabric softeners may break down the adhesive, causing the design to peel prematurely. Air drying is best, but if you use a dryer, opt for a low-heat setting.
If needed, iron the fabric inside out, and avoid ironing directly over the transfer. By following these care instructions, you can ensure that your custom-designed fabric items remain vibrant and intact for a long time.
Proper care and maintenance of your finished product enhances the longevity and appearance of the design. By following these steps, you can enjoy your custom creations for years.
Recommended Heat Press Settings for Different Fabrics (create a table)
Getting your settings right is one of the most important parts of heat transfer paper instructions that beginners often overlook. Every fabric responds differently, and using the wrong temperature can ruin both your design and your garment. Always do a test press on a scrap piece first. Here's a quick reference:
|
Fabric Type |
Temperature |
Pressure |
Time |
Peel |
|
100% Cotton |
375°F |
Medium-High |
15-20 sec |
Warm |
|
Polyester |
270°F-300°F |
Medium |
10-15 sec |
Cold |
|
Poly-Cotton Blend |
320°F-340°F |
Medium |
15-20 sec |
Warm |
|
Dark Fabrics |
350°F |
High |
20-25 sec |
Cold |
|
Nylon |
270°F |
Light-Medium |
10 sec |
Cold |
|
Canvas/Tote Bags |
375°F |
High |
25-30 sec |
Warm |
Always refer to your specific heat press transfer paper brand's guidelines, as Neenah and Forever may have slightly different recommendations for different fabric types.
Common Heat Transfer Problems and Solutions
Even when you know how to apply heat transfer paper correctly, things can still go wrong. Most problems trace back to incorrect settings, the wrong paper choice, or print quality issues originating with your printer. Catching the cause early saves you wasted materials and frustration. Here are the most common issues and how to fix them:
|
Problem |
Likely Cause |
Solution |
|
Design peeling |
Too little heat or time |
Re-press at correct settings |
|
Faded colors |
Wrong paper or poor print quality |
Check paper type and printer settings |
|
Incomplete transfer |
Uneven pressure |
Adjust the press and re-press |
|
Ghosting |
Design shifted during pressing |
Secure with heat-resistant tape |
|
Cracking after washing |
Over-pressing or wrong fabric |
Lower the temperature and check fabric compatibility |
|
Streaky print |
Clogged or worn printhead |
Clean or replace the printhead |
If streaky prints are a recurring issue before you even reach the press, your printer needs attention first. No amount of proper heat transfer printing can compensate for poor print output at the source.
Frequently Asked Questions
What printer works best with heat transfer paper?
Inkjet printers are the most popular choice for heat transfer paper projects, offering vibrant color output and broad compatibility with trusted brands like Neenah and Forever. Laser printers work well too, but require laser-specific transfer paper. Whichever you use, clean print output is essential for a sharp, professional heat transfer printing result.
Can heat transfer paper be used on dark fabrics?
Yes, but you need heat-press transfer paper specifically designed for dark fabrics. Standard light transfer paper won't show up on dark materials. Dark fabric papers have an opaque white base layer that makes colors pop. Always follow the recommended settings for dark fabrics and check the packaging before purchasing your paper.
What temperature should I use for heat transfer paper?
Temperature depends on your fabric and paper type. Most heat transfer paper instructions recommend between 270°F and 375°F. Cotton typically needs higher heat, around 375°F, while polyester requires lower settings to avoid scorching. Always follow your brand's specific guidelines and test-press on scrap fabric before committing to your final piece.
How long does heat transfer paper last on clothing?
With proper care, heat transfer printing designs can last for years. Washing inside out in cold water on a gentle cycle, avoiding bleach and fabric softeners, and air drying all significantly extend the design life. Knowing how to apply heat transfer paper correctly in the first place also directly affects how long it holds up
Can I use regular printers with heat transfer paper?
Yes, most standard inkjet printers work well with inkjet heat press transfer paper. Laser printers need laser-compatible paper. The key is clean, high-quality print output. Streaky or faded prints before pressing mean your final transfer will look the same. Always run a test print before committing your heat transfer paper to a project.
Conclusion
Mastering heat transfer paper allows you to customize fabrics in many creative ways. By following this step-by-step guide, you can achieve professional-quality results, whether working on personal projects or commercial orders. Each step is crucial for a successful transfer, from setting up your heat press machine to choosing the right paper and caring for your finished product.
High-quality materials like Neenah heat transfer paper and reliable heat press machines, such as the Insta heat press, ensure your prints and designs are vibrant, durable, and long-lasting. Additionally, understanding the differences between heat transfer and sublimation can help you choose the best method for your needs.
For all your printing needs, including heat transfer paper, heat press machines, laser printers, and inkjet spare parts, consider visiting a reputable online printer store like All Print Heads. Our extensive selection and expert advice can help you find the perfect products to enhance your printing projects.
By following best practices and using the right tools, you can achieve professional-quality results with each transfer. This guide gives you the fundamentals of heat transfer, regardless of your experience level. Enjoy exploring your creativity and confidently producing stunning, personalized fabrics with high-quality heat transfer paper.
2 commentaires
kerrystennis
Thank you for your help
Great job explaining.
Ulamila
Thank you very much for your excellent coaching
Very interesting